Aligning Engine and Transaxle Assembly
It is normally necessary to align the engine and transaxle mounts only after the assembly has been installed, or after the mounts have been loosened as part of another repair.
To align:
| 1. | Loosen the mounting bolts and nuts as indicated earlier in Fig. 5-9 and Fig. 5-10. Loosen the center bolts for the rear engine mount and the transaxle mount first. |
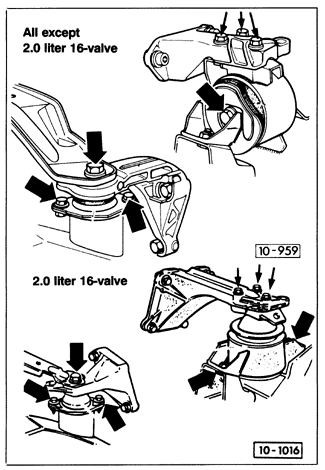
| Fig. 5-9. | Rear engine mounting bolts (right) and transaxle mounting bolts (left). The rear engine mount is attached to passenger-side of subframe behind engine. Transaxle mount is attached to transaxle and left side subframe. |
|
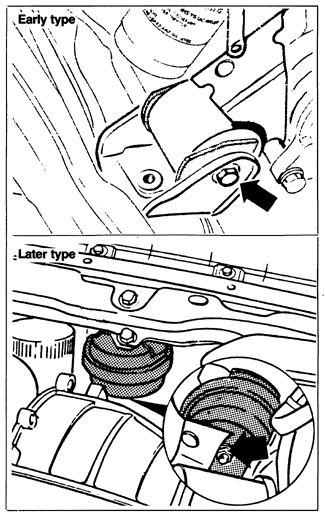
| Fig. 5-10. | Front engine mounting (arrows). Early type (top) uses rubber bushing. Later type (bottom) is hydraulic mount. |
|
| 2. | With the car sitting on the ground, lightly shake the engine and transaxle assembly to allow it to shift and find its own position. |
| 3. | Tighten the mounting bolts and nuts, beginning with the center bolts for the rear engine and transaxle mount first. Torque all the bolts and nuts to the specifications given earlier in Fig. 5-14 and Fig. 5-15. |
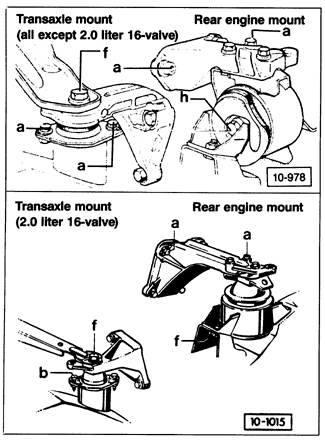
| Fig. 5-14. | Transaxle and rear engine mounting bolts. Torque a to 25 Nm (18 ft. lb.), b to 30 Nm (22 ft. lb.), f to 60 Nm (43 ft. lb.), and h to 80 Nm (59 ft. lb.). |
|
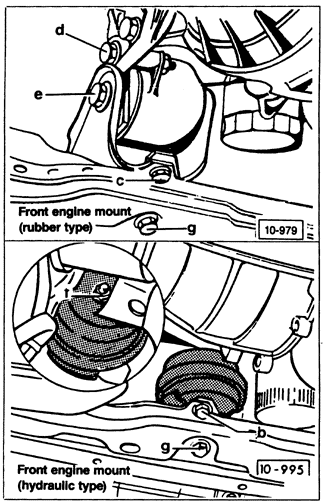
| Fig. 5-15. | Front engine mounting bolts. Torque b to 30 Nm (22 ft. lb.), c to 35 Nm (25 ft. lb.), d to 45 Nm (33 ft. lb.), e to 50 Nm (36 ft. lb.), f to 60 Nm (43 ft. lb.), and g to 70 Nm (51 ft. lb.). |
|
|