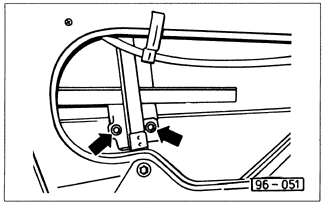
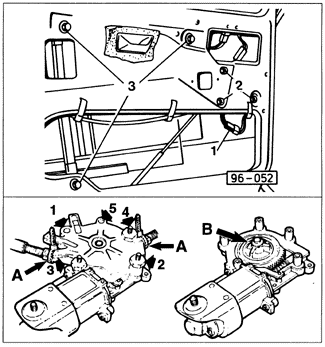
Power Window RegulatorTroubleshoot the power window electrical circuit as described in ELECTRICAL SYSTEM before assuming that the regulator motor is faulty. To remove the regulator and motor, lower the window and remove the interior trim panel and plastic liner as described above. Remove the bolts that hold the window glass to the regulator guide rail. See Fig. 5-3 above. Lower the glass into the door. Unplug the electrical connector and remove the guide rail and motor mounting bolts as shown in Fig. 5-4. Remove the regulator and motor assembly. To replace the motor, first use tie wraps to clamp together the housing cover and plastic bearing cover. See Fig. 5-4. Remove the motor mounting bolts and lift off the cable assembly housing. Remove the vaned gear from the new motor and install it into the cable assembly housing. The rubber plate and ring gear stay in the motor. Install the new motor to the cable housing and tighten the mounting bolts to 3 Nm (27 in. lb.) in the sequence shown in Fig. 5-4. Leave the tie wraps installed.


|