Removing and Installing Rear Shock Absorbers and Springs
The rear shock absorbers are mounted with conventional hardware which should not require any special tools for removal and installation, however, a Volkswagen special tool is available for use in removing and installing the top nut which is difficult to reach.
Remove and install the shock absorber and spring assemblies one side at a time only, in order to prevent the rear axle assembly from hanging unsupported and damaging the brake lines.
To remove and install:
| 1. | Inside the car, snap off the plastic cap that covers the upper shock absorber mount. See Fig. 6-1. Loosen and remove the nut and the dished washer beneath the nut. |
| 2. | Raise the car slowly until the coil spring is unloaded and the top of the shock absorber and spring assembly begins to pull away from the body. |
NOTE-
When jacking, do not use any part of the suspension for a lifting point. The axle beam and trailing arms must not be supporting the car.
|
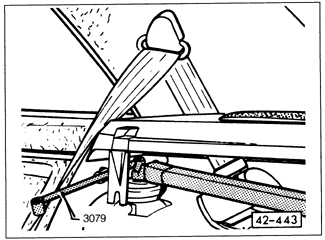
| Fig. 6-1. | Rear shock absorber mounting nut being removed from inside car using Volkswagen special tool no. 3079 (order no. T03 079 000 42 ZEL). |
|
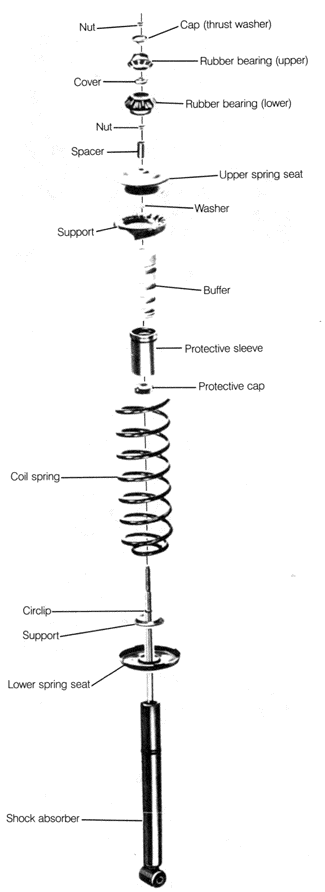
| 3. | Position jack stands to support the car securely. Remove the nut and bolt that mount the bottom of the shock absorber to the trailing arm, and remove the assembly from the car. Fig. 6-2 illustrates the components of the shock absorber and spring assembly. |
| Fig. 6-2. | Exploded view of rear shock absorber and spring showing components and order of assembly. Mounting hardware not shown. |
|
| 4. | On installation, use a new self-locking nut at the bottom shock absorber mount. Torque the bolt and nut to 70 Nm (52 ft. lb.). Torque the top mounting nut to 15 Nm (11 ft. lb.). |
|