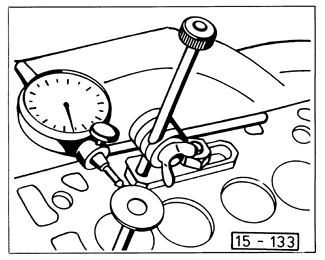
Valve GuidesSpecial tools and a press are required to replace valve guides. Check valve guide wear with a new valve, as shown in Fig. 4-25. Inspect the valve seats to ensure that the cylinder head can be reconditioned before installing new valve guides.
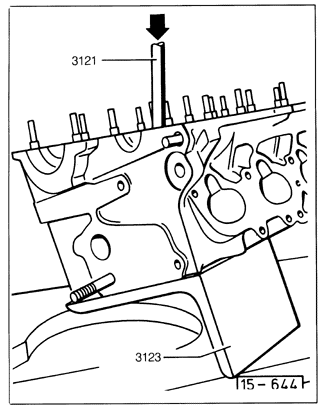
On 8-valve engines, original valve guides, without shoulders, are pressed out from the camshaft side of the cylinder head. Replacement valve guides, with shoulders, are pressed out from the combustion chamber side of the cylinder head. Lubricate new valve guides with oil and press them in from the camshaft side. Remove and install guides with Volkswagen special tool no. 10-206 (order no. T10 206 000 15 ZEL). On 16-valve engines, valve guides are pressed out from the camshaft side of the cylinder head. Lubricate new valve guides with oil and press them in from the camshaft side. Remove and install guides with Volkswagen special tool no. 3121 (order no. T03 121 000 15 ZEL), and ream guides with Volkswagen special tool no. 3120 (order no. T03 120 000 15 ZEL). To remove and install intake valve guides, support the cylinder head at an angle as shown in Fig. 4-26, using Volkswagen special tool no. 3123 (order no. T03 123 000 15 ZEL).
|