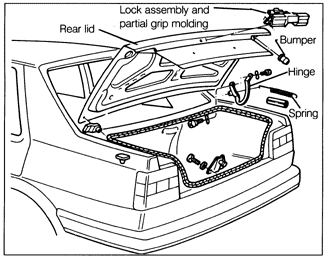
Rear Lid and HatchbackFig. 6-22 is a view of the Jetta rear lid and its related components. The Golf and GTI hatchback does not have springs on the hinges. Instead, gas struts are used to assist raising the hatch. The hatchback hinges are located at the top of the hatch. It is necessary to partially remove the headliner for access to them. If the rear lid or hatchback is to be removed, mark the hinge locations before loosening the mounting bolts. Fig. 6-23 shows the Golf hatchback lock assembly. Fig. 6-24 shows the Jetta rear lid lock assembly.
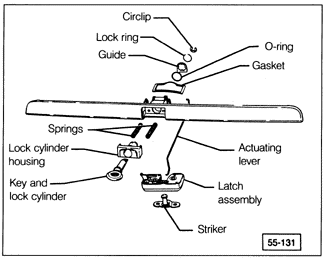
To remove the Jetta lock assembly and grip molding, remove the six screws holding the grip molding to the rear lid and remove the moldings from either side of the lock. Open the lid and, working from the inside, unclip the actuating lever from the lock assembly. Press in the two lock tabs holding the lock to the lid and remove the lock assembly. See Fig. 6-25. To remove the lock assembly from the grip molding, remove the circlips. The key must be inserted in the assembly. Installation is the reverse of removal. Make sure that the lock gasket is intact.
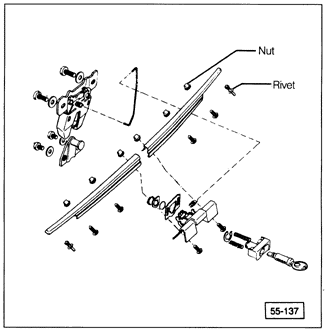
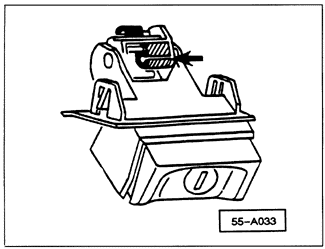
To remove the Golf and GTI hatchback lock assembly, remove the grip molding by removing the four screws. Open the hatchback and remove the inside hatch trim panel by removing its retaining clips. Unclip the actuating lever from the lock assembly, press in the two lock tabs holding the lock assembly to the hatch, shown above in Fig. 6-25, and remove the lock. Installation is the reverse of removal. Make sure that the lock gasket is intact. Volkswagen now makes available one rear lid lock assembly for replacement on all cars, with or without central locking. The lock assembly must be adjusted for the particular application prior to installation, as shown in Fig. 6-26.
To replace a license plate bulb, remove the screws that hold the lens to the lid. Push and twist the bulb to remove and install it. Tighten the lens screws just until they are snug to avoid cracking the lens. Replacement bulbs are part no. N 017 753 2 (U.S. trade no. 168). |