8.1 Digifant I On-Board Fault DiagnosisThe Digifant I control unit has built-in on-board diagnosis (OBD) circuitry. The circuitry monitors the normal range of system operating values, detects unusual values and other faults, and stores fault information for later recall. If the system detects a fault it illuminates a warning light on the instrument panel labelled "CHECK". When operating properly, the light should illuminate every time the ignition is turned on and go out when the engine starts. If the light remains on after the engine starts it means that the system has detected a fault. If the fault is a temporary condition, the light may go out some time after the engine starts, but the fault will remain stored in the control unit memory.
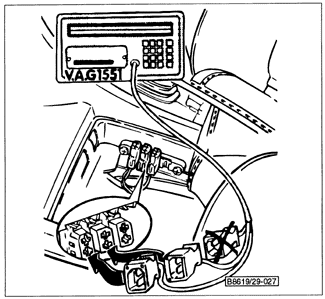
There are two ways to access the control unit fault memory. Volkswagen dealer service technicians use a special test instrument, the VAG 1551, to display coded fault information, test system components, and conduct a check of ECU output functions. The tester is connected to the ECU using a set of dedicated diagnostic connectors under the trim plate in the center console. See Fig. 8-1.
The fault memory can also be accessed using a special jumper cable, Volkswagen tool no.357 971 514E with color-coded white and black terminals. When the jumper is connected, the CHECK light will display any fault codes in a series of flashes. For example, two flashes, followed by three flashes, followed by four flashes, followed by two flashes indicates the code 2-3-4-2. Table s lists Digifant I OBD fault codes. The bold numbers in the probable cause column refer to headings in this chapter where additional tests are described. Table s. Digifant I On-Board Diagnosis (OBD) Fault Codes
To access fault memory using jumper cable:
Possible wiring faults should be checked and corrected as described in 8.6 Electrical Tests before replacing a suspected component. Once the fault is corrected, the permanent fault memory should be erased as described below. To erase fault memory using jumper cable:
|
